PDF: Click here to download the Getting Started with ACE Guide!
Video: Profile Area: How to Brand Your ACE Account
Video: How to Setup RISMedia’s ACE to auto-post to Social Media sites
After you have signed up for ACE you will want to personalize the account with your information and start sharing to social media. Here’s a step by step guide to getting started.
Personalize Your Account
If you are not already here, select My Account > Profile from the top ACE menu. The Profile area brands the content you share with your information helping to promote your business to your social contacts. Fill out the profile form with as much information as you can. You will be able to return to this area to update or make changes anytime however it is strongly suggested that you complete this profile area before you begin sharing. It is important that this form is completed in full so that your friends see your proper information.There is specific help for uploading your profile picture and logo(s) below:
Uploading Your Headshot
1) Below the default headshot placeholder, click the words “Click here” to begin the process.
2) Click “Browse” to navigate to your headshot and click it to select it. Note: Your headshot file cannot be larger than 500KB.
3) Navigate to your headshot. Click the headshot to highlight it, then click “Open” to select.
4) You should see the name of your headshot file. Click Upload! If you do not see the name file name, click “Browse…” and repeat the process to this point.
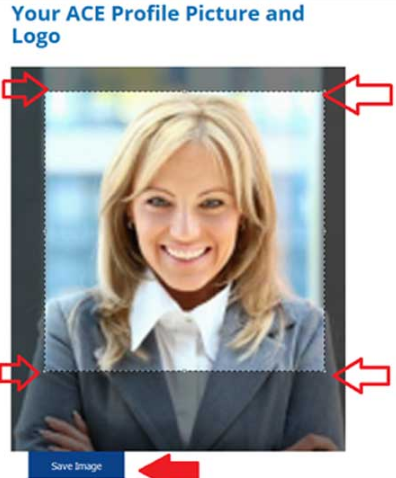
5) Optional: Crop Your Photo. With your mouse, click and drag the borders of the clear box to crop the picture to your liking.Click “Save Image” This will become the headshot that will appear along with your contact info on your branded pages.
6) Your headshot is loaded. If you are not happy with your current headshot repeat the steps to your liking. If you are ready move on to add your company logo(s).

Uploading Your Logo
You may upload two logos to your ACE account to help brand your landing pages. Again this is the information readers will see when they click to read the full article from your social media sites. Why two logos? Some agents might be part of a team and may want to show the team logo as well as their company or brand logo.
If you only have one logo then use the “Click here” in the top, primary, logo box. Only use the secondary logo if you have already added a logo to the primary logo area. Similar to you headshot, click “Click here” to upload and crop your logo(s)
As you did for your headshot, click “Browse” to navigate to your logo, upload, crop, and save.![]()
Complete the Remaining Profile Fields
- Fill in any of the remaining areas of your ACE profile that you would like to be shown to your readers such as a link to your listings, your phone, website, etc.
- If your listings are online add anchor text like, “Featured Listings” to the “Listings Website Name” area. Copy and paste your listings page URL into the “Listings Website Link” area.
- If your State requires you to include your real estate agent license number you may add that to the “Misc Field”.
- Include the REALTOR and Equal Housing Opportunity icon if you like.
- Click the “Submit” button to save any changes.

ACE Social Media Setup: Auto-Posting to Social Media Sites
Here are some tips about ACE and auto-posting to social media websites:
- Be sure to log out of your social media site BEFORE creating a connection in ACE. Example: Open a new tab go to Facebook.com, if you are logged into Facebook click the upside down triangle at top right and Log Out, then return to ACE Social Network Setup area to “Add” a Facebook connection.
- ACE is secure. ACE does not capture or hold your social media password, all social logins are done through the social media provider itself.
- From time to time you may need to log back into your social media account to renew permissions in order for ACE to continue auto-posting on your behalf. For example if you change your Facebook password – you will need to login to ACE delete your current connection and then create a new connection with your new password.
- With ACE you can manually or automatically post to your social media sites with fresh, relevant content from RISMedia the leader in real estate information.
- If you turn Auto-Post “ON” you can still manually share from the ACE exclusive Content area or share just about anything from the RISMedia.com website.
- If you elect not to use the Auto-Post feature you can still manually share from the ACE exclusive Content area or share just about anything from the RISMedia.com website.
- You can turn Auto-Post ‘OFF’ anytime.
- ACE will send you an email alert to let you know what content has been automatically posted for you. You can turn these notifications off.
- If, for some reason, you did not like the content that was automatically posted you can login to your social media account to remove the post.
How to Setup ACE Auto-Posting to Facebook
All Facebook users have a “profile”, your Facebook profile is typically used to connect with friends and can only be seen by others if they log into Facebook. Many Facebook members also have a Facebook “page” which is typically used for businesses and can be accessed by the public. In other words visitors do not need to be logged in, or a member of Facebook to see a business page. As of August 2018 services like ACE can only post to a Facebook business page which you have admin or editor rights. (ACE, and services like ACE, can no longer post a Facebook personal profile.) You can change your ACE auto-post settings anytime to stop.
How to connect ACE to Facebook and start auto-posting:
Be sure to log out of your social media site BEFORE creating a connection in ACE. Example: Open a new tab go to Facebook.com, if you are logged into Facebook click the upside down triangle at top right and Log Out, then return to ACE Social Network Setup area to “Add” a Facebook connection.
In ACE top menu click “Social Network Setup”…
![]()
Click the “Add” button near the Facebook area to get started…
Set Your Facebook Posting Schedule. Select the day you would like posts to occur, if you’d like Bonus Posts, and click Create Connection.
The Facebook login window will launch. You are now on Facebook. Facebook will ask you for username and password.
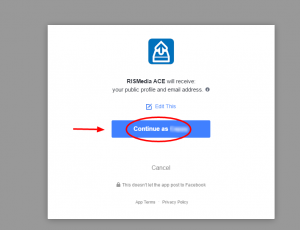
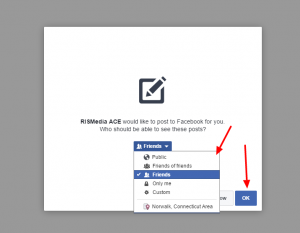
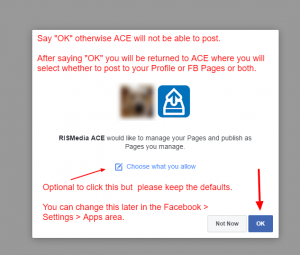
AFTER SUCCESSFUL LOGIN TO FACEBOOK AND – IF THIS IS YOUR FIRST TIME CREATING A CONNECTION THEN FACEBOOK WILL PRESENT A SERIES OF PROMPTS ASKING YOU YO CONFIRM THAT ACE CAN POST ON YOUR BEHALF. YOU MUST SAY ‘OK’ OR ‘YES’ TO THESE PROMPTS IN ORDER TO BE RETURNED TO ACE.
ACE will list any Facebook business pages that it has found in your FB account…
Check the boxes near the Facebook areas that you want to have automatically updated with ACE posts. You can change this later, anytime. Click Update…
Success! ACE is now ready to start auto-posting to the selected area of your Facebook account. Auto-posting will begin within 24 hours…
If you would like to post something right away, consider posting something manually from the ACE Exclusive Content area or visit RISMedia.com and share just about any story. RISMedia.com is the leader in real estate information and updates with new stories daily.
Edit Auto Post Settings: Need to make a change to your Facebook auto-post settings? Click “Setup Social Network” from the top menu to access the “ACE Social Media Set-up” page. Click “Edit” button near your Facebook connection.
Make any changes or delete the connection altogether…